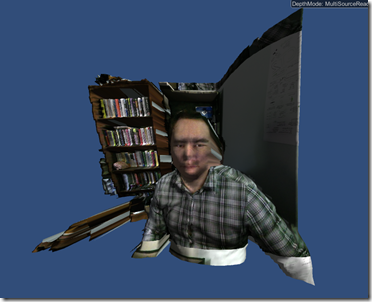
Until just this month one of the best Kinect 2 integration tools was hidden, like Rappuccini’s daughter, inside a walled garden. Microsoft released a Unity3D plugin for the Kinect 2 in 2014. Unfortunately, Unity 4 only supported plugins (bridges to non-Unity technology) if you owned a Unity Pro license which typically cost over a thousand dollars per year.
On March 3rd, Unity released Unity 5 which includes plugin support in their free Personal edition – making it suddenly very easy to start building otherwise complex experiences like point cloud simulations that would otherwise require a decent knowledge of C++. In this post, I’ll show you how to get started with the plugin and start running a Kinect 2 application in about 15 minutes.
(As an aside, I always have trouble keeping this straight: Unity has plugins, openFrameworks as add-ins, while Cinder has bricks. Visual Studio has extensions and add-ins as well as NuGet packages after a confusing few years of rebranding efforts. There may be a difference between them but I can’t tell.)
1. First you are going to need a Kinect 2 and the Unity 5 software. If you already have a Kinect 2 attached to your XBox One, then this part is easy. You’ll just need to buy a Kinect Adapter Kit from the Microsoft store. This will allow you to plug your XBox One Kinect into your PC. The Kinect for Windows 2 SDK is available from the K4W2 website, though everything you need should automatically install when you first plug your Kinect into your computer. You don’t even need Visual Studio for this. Finally, you can download Unity 5 from the Unity website.
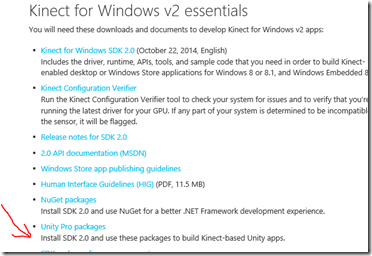
2. The Kinect 2 plugin for Unity is a bit hard to find. You can go to this Kinect documentation page and scroll half-way down to find the link called Unity Pro Packages. Aternatively, here is a direct link to the most current version of the plugin as of this writing.
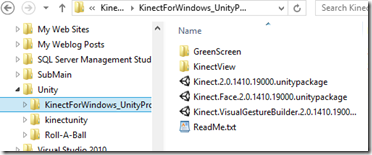
3. After you finish downloading the zip file (currently called KinectForWindows_UnityPro_2.0.1410.zip), extract it to a known location. I like to use $\Documents\Unity. Inside you will find three plugins as well as two sample scenes. The three Kinect plugins are the basic one, a face recognition plugin, and a gesture builder plugin, each wrapping functionality from the Kinect 2 SDK.
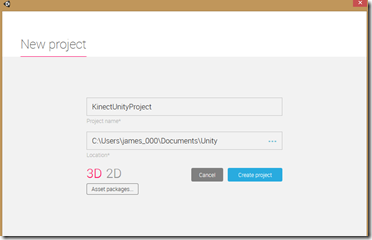
4. Fire up Unity 5 and create a new project in your known folder. In my case, I’m creating a project called “KinectUnityProject” in the $\Documents\Unity folder where I extracted the Kinect plugins and related assets.
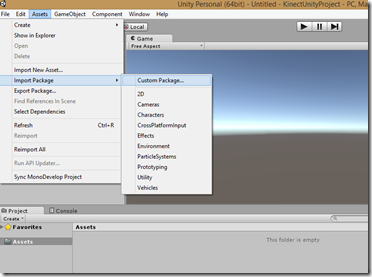
5. Now we will add the Kinect plugin into our new project. When the Unity IDE opens, select Assets from the top menu and then select Import Package | Custom Package …
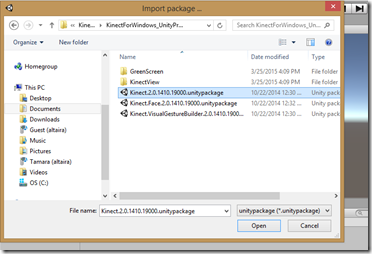
6. Navigate to the folder where you extracted the KinectforWindows_Unity components and select the Kinect2.0.xxxxx.unitypackage file. That’s our plugin along with all the scripts needed to build a Kinect-enabled Unity 5 application. After clicking on “Open”, an additional dialog window will open up in the Unity IDE called “Importing Package” with lots of files checked off. Just click on the “Import” button at the lower right corner of the dialog to finish the import process. Two new folders will now be added to your Project window under the Assets folder called Plugins and Standard Assets. This is the baseline configuration for any Kinect project in Unity.
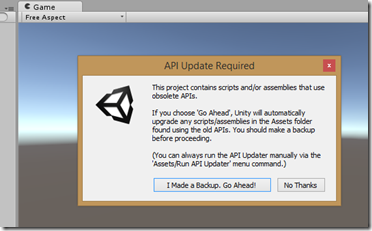
7. Now we’ll get a Kinect with Unity project quickly going by simply copying one of the sample projects provided by the Microsoft Kinect team. Go into file explorer and copy the folder called “KinectView” out of the KinectforWindows_Unity folder where you extracted the plugins and paste it into the Assets directory in your project folder. Then return to the Unity 5 IDE. A warning message will pop up letting you know that there are compatibility issues between the plugin and the newest version of Unity and that files will automatically be updated. Go ahead and lie to the Unity IDE. Click on “I Made a Backup.”
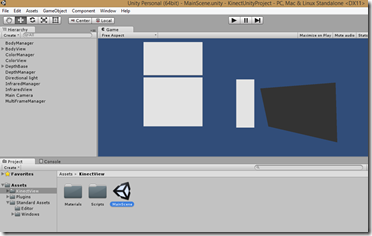
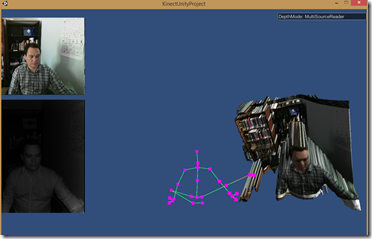
8. A new folder has been added to your Project window under Assets called KinectView. Select KinectView and then double click on the MainScene scene contained inside it. This should open up your Kinect-enabled scene inside the game window. Click on the single arrow near the top center of the IDE to see your application in action. The Kinect will automatically turn on and you should see a color image, an infrared image, a rendering of any bodies in the scene and finally a point cloud simulation.
9. To build the app, select File | Build & Run from the top menu. Select Windows as your target platform in the next dialog and click the Build & Run button at the lower right corner. Another dialog appears asking you to select a location for your executable and a name. After selecting an executable name, click on Save in order to reach the final dialog window. Just accept the default configuration options for now and click on “Play!”. Congratulations. You’ve just built your first Kinect-enabled Unity 5 application!

Great tutorial to get you started!
Do you have any more more specific tutorials about how to access body data ect…?
Is it possible to use Asus xtion pro live instead of Kinect for the plugin?
Hi Daniel,
You cannot use the Asus Xtion Pro with this solution, which is built around the Kinect v2 SDK.
thanks for the reply 🙂
Is it possible to clean up the scene, meaning remove the straightlines the pull from the point of contact backwards. So that it only shows the points that first make contact with the infrared laser.
Forgot to add email notification, please respond to this one.
[…] http://box5921.temp.domains/~imagipi2/blog/2015/03/27/unity-5-and-kinect-2-integration/ […]